

Wetroom Installations
How to Install a Wet Room on a Wooden/Timber Floor
Floor & Wet Room Drain Installation
If you plan to install a wet room onto a wooden/timber floor, the most popular way of doing so is to install a wetroom floor former or dec. The floor former will have a consistent gradient or fall built in to it to channel water to the drain. In order to fit the dec onto the joists, a section of the sub floor equal to the size of the dec needs to be removed and the dec fitted into the gap. The idea is to replace the sub floor section with the dec which is supported with ply lining before being waterproofed.

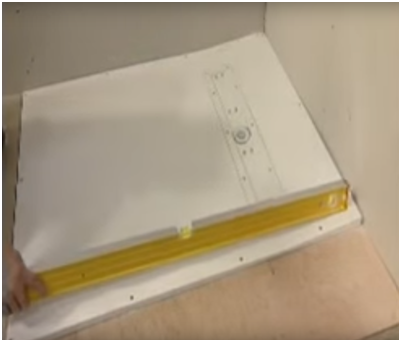
Once the sub floor is removed, 18mm plywood should be fixed onto timber battens to provide a flat base for the floor former.This will ensure the dec is even with the rest of the flooring. Noggins can also be used to support the edge of the floor former.
Once the dec is level, you can start the process of installing your drainage. Loosely fit your drainage component and drill out the centre of it using a 50mm hole saw. Using the pilot hole as a reference point, cut out a 90mm diameter hole in the 18mm ply. Remove the ply and loosely fit the trap onto the waste pipe. Loosely re-position the 18mm ply, Floor Former and Base Component to re-check alignment and once adjusted, solvent weld the trap into position. 18mm ply should then be fixed to the support battens and the floor former should then be fixed flush to the ply support.
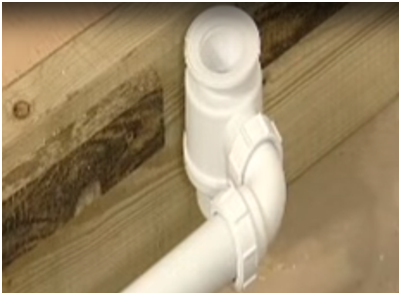
The rubber seal should be fitted to the trap and the base component screwed into the floor former, prior to loosely fitting the grill to check its positioning. Suitable jointing compound should be applied to the neck and screwed into the trap. The floor should be level and is now ready to install the waterproof floor membrane.
Once the dec is level, you can start the process of installing your drainage. Loosely fit your drainage component and drill out the centre of it using a 50mm hole saw. Using the pilot hole as a reference point, cut out a 90mm diameter hole in the 18mm ply. Remove the ply and loosely fit the trap onto the waste pipe. Loosely re-position the 18mm ply, Floor Former and Base Component to re-check alignment and once adjusted, solvent weld the trap into position. 18mm ply should then be fixed to the support battens and the floor former should then be fixed flush to the ply support.
The rubber seal should be fitted to the trap and the base component screwed into the floor former, prior to loosely fitting the grill to check its positioning. Suitable jointing compound should be applied to the neck and screwed into the trap. The floor should be level and is now ready to install the waterproof floor membrane

you can call our team at 24/7 on Mob: 07547 107 770
How to Install a Wet Room on a Wooden/Timber Floor
Floor & Wet Room Drain Installation
If you plan to install a wet room onto a wooden/timber floor, the most popular way of doing so is to install a wetroom floor former or dec. The floor former will have a consistent gradient or fall built in to it to channel water to the drain. In order to fit the dec onto the joists, a section of the sub floor equal to the size of the dec needs to be removed and the dec fitted into the gap. The idea is to replace the sub floor section with the dec which is supported with ply lining before being waterproofed.
Once the sub floor is removed, 18mm plywood should be fixed onto timber battens to provide a flat base for the floor former.This will ensure the dec is even with the rest of the flooring. Noggins can also be used to support the edge of the floor former.
Once the dec is level, you can start the process of installing your drainage. Loosely fit your drainage component and drill out the centre of it using a 50mm hole saw. Using the pilot hole as a reference point, cut out a 90mm diameter hole in the 18mm ply. Remove the ply and loosely fit the trap onto the waste pipe. Loosely re-position the 18mm ply, Floor Former and Base Component to re-check alignment and once adjusted, solvent weld the trap into position. 18mm ply should then be fixed to the support battens and the floor former should then be fixed flush to the ply support.
The rubber seal should be fitted to the trap and the base component screwed into the floor former, prior to loosely fitting the grill to check its positioning. Suitable jointing compound should be applied to the neck and screwed into the trap. The floor should be level and is now ready to install the waterproof floor membrane.
Once the dec is level, you can start the process of installing your drainage. Loosely fit your drainage component and drill out the centre of it using a 50mm hole saw. Using the pilot hole as a reference point, cut out a 90mm diameter hole in the 18mm ply. Remove the ply and loosely fit the trap onto the waste pipe. Loosely re-position the 18mm ply, Floor Former and Base Component to re-check alignment and once adjusted, solvent weld the trap into position. 18mm ply should then be fixed to the support battens and the floor former should then be fixed flush to the ply support.
The rubber seal should be fitted to the trap and the base component screwed into the floor former, prior to loosely fitting the grill to check its positioning. Suitable jointing compound should be applied to the neck and screwed into the trap. The floor should be level and is now ready to install the waterproof floor membrane
you can call our team at 24/7 on Mob: 07547 107 770